Saturday, October 31, 2009

Cattle Quilt.....Ready for Quilting


This is a comfort quilt for a friend who is not feeling well.

My objective for this quilt:
* Complete it in the 3 days I have available to make it
* Use the fabrics I have in my stash, as I have no time to run to town to shop
* Give it a masculine look and use cow fabrics

Day 1: Pieced the Star Blocks and Designed the quilt top on paper

Day 2: Pieced the quilt top, Piece the quilt backing, Baste it together


Click Images to Enlarge:


Sashing Strips between Star Blocks
Always place the pieced unit on top.
That way you can control the direction of the seam allowances.


The brown sashing fabric is on the bottom.
The star block is on top where I can see and control the direction of the seam allowances.


Star Points
Notice the X where the stitching lines cross over each other...
This is the Sweet Spot


You want to sew across that X, but NOT to the left side of the X.


Pointy Star Points
This gives you pointy star points


Star Points
Crisp and Pointy


Master Piece Thread
60 wt cotton thread made specifically for piecing.
It is thin, very strong, and nearly lint-free.
It does not add any bulk to the seam allowance when you are precision piecing.


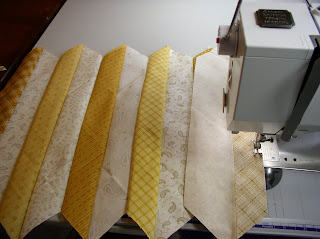
Border Strips
When piecing strips for borders do not butt them up and sew them together.


Border Strips
Place them on a 45 degree angle and piece them on the diagonal.
I like to use a ruler and draw a pencil line to follow.


Border Strips
Sew along the drawn line.


Border Strips


Border Strips
Trim off the excess corner to the right of the seam.


Border Strip
A diagonal line isn't as easy for the eye to follow as a straight seam in the borders.


Chicken Wool Pincushion
This is a gift from my friend, Suzette
I call her Henny Penny


She is weighted down and quite heavy.
She sits nicely on my sewing machine.
The machine is computerized and I cannot keep a magnetic pincushion near it.
Henny Penny is just right for the job!


Cattle Quilt Top Done
60 x 70 inches
By 2pm the top is done.
I ran in the house to show my favorite guy.


Cattle Quilt Basted and Ready for Machine Quilting
By 6pm the back is pieced and the quilt is basted and ready to go!

I don't have to tell you what I will be doing tomorrow on Day 3


May Your Bobbin Always Be Full,
LuAnn

To see my New Work CLICK HERE

To see the Thread Shed CLICK HERE

To see my Exhibit Quilts CLICK HERE

To see Tutorials CLICK HERE
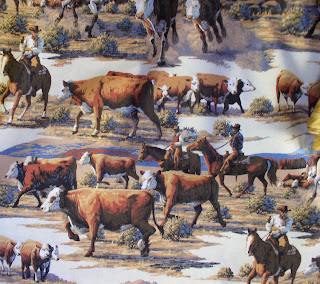
Cattle Quilt......Cattle Call


Day 2 of creating the Cattle Quilt....I have enjoyed looking at the cow fabric and thinking of the person this quilt is intended for.

I have decided to name the quilt.......Cattle Call

Enjoy the video below:

Friday, October 30, 2009

Cattle Quilt & Bias Squares...


Click Images to Enlarge:


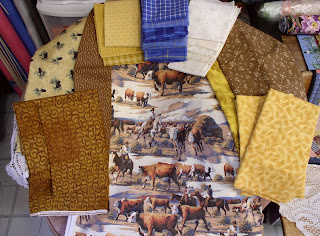
We raise commercial beef cattle so I am always on the look out for great cow fabric.
When I saw this....I bought the whole bolt.
I have made a few quilts with it and some pillowcases so far...

Our friend, who raises cattle himself, is in need of a comfort quilt.
I have just the fabric!


Fabric for Sawtooth Star Blocks
I have decided to include stars in the quilt.
I pulled golds, blues, and creams from my stash for the star blocks.


Cattle Quilt.....Design Work
Here are a few fabrics I pulled from the stash.
I am thinking brown and gold border fabrics.


Fabric looks like cattle brands...
I'm not sure if this fabric will work or not, but it reminds me of brands.


Bias Squares Strip Set
When you are in need of a lot of bias squares this is the very best and most accurate method with very little waste.
I need 80 bias squares for the 10 star blocks.


Back To Square One Book
This book includes instructions for making Bias Square Strip Sets


Feathered Star Book
This book also contains instructions for creating Bias Square Strip Sets


Ocean Waves Book
Yes, the book also included directions.


Guide to Rotary Cutting
This one also contains directions.

Look around your quilt library, maybe one of your books includes this method.
I recommend it highly.
I have been making bias squares this way for 10 years.


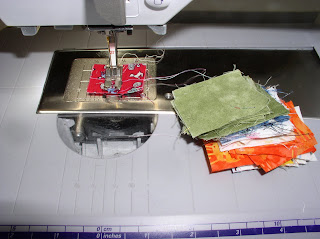
Security Blanket
Also known as a "Leader Square"
I start and end all of my piecing with a scrap of fabric.
All of the threads are secured to this square, and no threads on my work.
I don't have to hold the two threads when beginning to stitch, the security blanket does that for me.


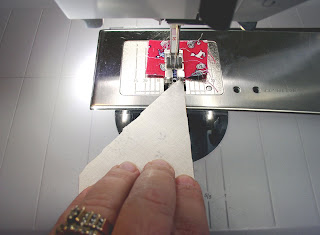
Assembly Line Piecing
I assembly line or chain piece every opportunity I get.
Just feed one piece in behind the last one, no stopping, starting or cutting threads.
Saves a lot of time and thread.


Assembly Line Piecing
Pile up all of your pieces to the left of your sewing machine.
Feed them through one right after the other until they are all pieced.


Security Blanket
Don't forget to sew a Security Blanket to the very end of your Assembly Line Piecing.
Then snip the threads and leave this security blanket in place.


Straight Stitch Throat Plate
When sewing very pointy pieces, the fabric can sometimes get shoved down into the machine by the needle.
By using a straight stitch throat plate (not an oblong zig zag throat plate) the pointy pieces of fabric will feed through beautifully.


Bias Square Strip Set
All Sewn and ready to be pressed.


Bias Square Strip Set
Ready to cut into Bias Squares.
This Bias Square Ruler is one of my all-time favorites!


Cutting Bias Squares
Line up the 45 degree line on your seam.
I am cutting 2.5 inch squares.


Cutting Bias Squares
Continue down the bias square strip set and cut squares.
Then, rotate the squares and trim the other side.
This gives you a perfectly accurate bias square with no stretching.
You never deal with tiny triangles, and there is very little waste of fabric.


Sawtooth Star Blocks
I put all of my cut pieces on a flannel board.
They are easily transported from the cutting table, to the sewing machine, to the ironing board.

Tomorrow I will complete the quilt top and begin basting...

May Your Bobbin Always Be Full,
LuAnn

To see my New Work CLICK HERE

To see the Thread Shed CLICK HERE

To see my Exhibit Quilts CLICK HERE

To see Tutorials CLICK HERE

Thursday, October 29, 2009

Bright Light, Costumes & Grapes...


Click Images to Enlarge:

Bendable Bright Light

My 15 year old New Home Sewing Machine has a new light.
Even though I have a new Bernina, I still rely on my New Home for ALL of my applique work.
I added a bright light to my Bernina and to my Featherweight 221.
Now the New Home can also see so much better.
After you have a bright light.....you will feel like you have been sewing in the dark all of these years!


I spent the day making costumes.
This one is for my son......Nicholas......26 years young.
I added textile medium to black acrylic paint for the triangles on Fred Flintstone's shirt.
Painting on the very bright orange fabric put me in a great mood.


Fred Flintstone is ready for Halloween.


These are the last of my Grape Arbor images

Enjoy Them!


The images are all uploaded at high resolution.
Feel free to use them in your artwork if you are so inspired.


May Your Bobbin Always Be Full,
LuAnn

To see my New Work CLICK HERE

To see the Thread Shed CLICK HERE

To see my Exhibit Quilts CLICK HERE

To see Tutorials CLICK HERE
Wednesday, October 28, 2009

Fabric Beads....Permission 2 Play Class


Click Images to Enlarge:

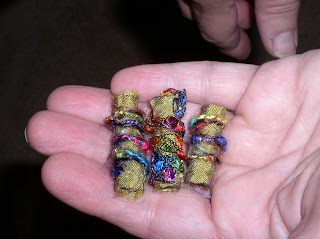
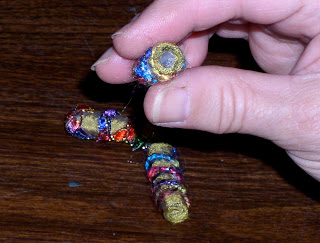
Fabric Beads


The Permission 2 Play group met and created Fabric Beads
What a fun class!


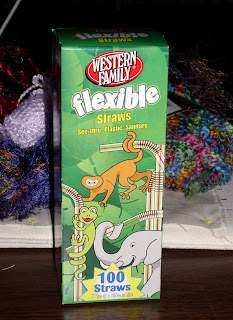
Plastic Straws

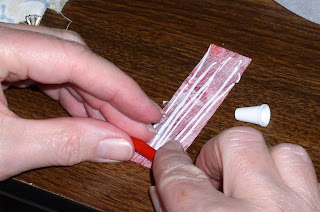
You begin by cutting a plastic straw into 1 inch sections...


Method 1 - Fabric Glue
Using fabric glue and a small scrap of fabric 1x3 inch size.
Apply glue to the back side of the fabric.
This is a safe method for children.


Roll the glued fabric around the 1 inch section straw


Roll it all the way up...


Roll it in your fingers so all of the layers glue together nicely...


Embellish your fabric bead with fibers of your choice...
You can also thread tiny beads onto wire and wrap them around your fabric bead.
Tiny charms are also fun to add.


The straw in the center of the bead makes it easy to thread the beads onto a bracelet, necklace, or sew them onto your art quilts for embellishment.


Method 2 - Fusible Web
Apply fusible web to the back side of your fabric.
Then cut your fabric into 1x3 inch pieces.


Place a piece of plastic straw on the fused side of your fabric.
Use an iron to fuse the fabric to the straw.
Our instructor, Cindy, is using a clover mini iron in this photo.
She is using a wooden skewer to hold the bead in place.


In this photo Cindy us using the back side of the iron to fuse the fabric around the bead
Again, she is using a wooden skewer to hold the bead in place.


Yarns & Fibers
This is a great way to embellish with all of those yarns and fibers we have added to our stash.


Fabric Beads
Give'em a try....lots of fun!


The Permission 2 Play "Living Well with Cancer and Healing through Quilting" group meets once each month to create textile art. JanniLou Creations Quilt Shop in Philomath Oregon donates their large classroom space for us to work in, the members of the Marys River Quilt Guild supply the fabrics, the Instructors donate their time and talents to lead the classes. Click on the "Comment" link below this post if you would like to know more about this FREE class offering.


May Your Bobbin Always Be Full,
LuAnn