Sunday, February 28, 2010

New Bed Frames for the Garden...


Click Images to Enlarge:

It was such a gorgeous day today, I pulled myself away from the sewing machine to spend the day out of doors.

I found these metal bed frames at thrift stores over the winter months.
It is now time to put them to work in the garden.


Brad set up wooden fence posts in the back yard to hold up the bed frames while I painted them.


First coat is........Primer


These young yearling calves find anything we do in the yard just fascinating!
We are a spectator sport...


Calves......just over the fence


The calves were very interested in the paint spray can.


5 Bed Frames........a beautiful sage green color


Gunnr is always good company when I am outdoors.

CLICK HERE:  to see My Quilts

CLICK HERE to view what I do with the painted bed frames.

CLICK HERE to view my New Work.

CLICK HERE to view my flowers.


May Your Garden be full of Bed Frames,
LuAnn

Saturday, February 27, 2010

Permission 2 Play.....Melted Metallic Crayon Printing


February 2010 Class

Click Images to Enlarge:

Melted Metallic Crayon Printing Class
Instructor: Virginia Gregory


How much fun can you have with Metallic Crayons?

We will show you!


Shaving off pieces of the metallic crayons


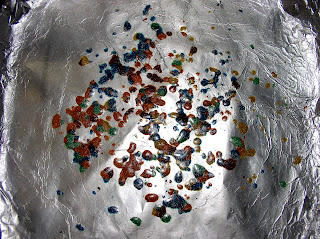
Look what happens to the crayons when they are put into a warm electric skillet
220 degrees.......no hotter.


Black Cotton Fabric is placed on top of the melted crayons.
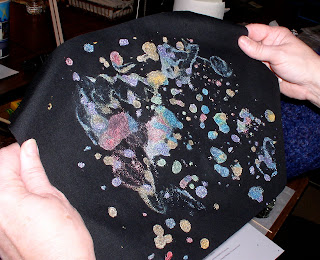
Pull the cotton off the crayons to reveal your print...

This print was made from the melting crayons in the frying pan above.


Kathy's crayon print


Virginia's Crayon Print


Cindy's Crayon Print


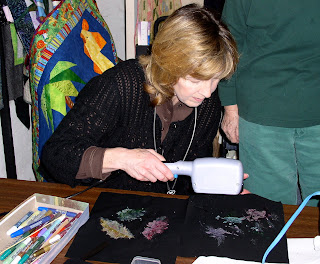
Glitter Glue was used to embellish the crayon prints


Martha is using a hair dryer to dry the glitter glue


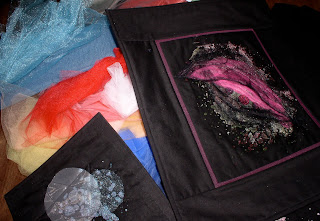
Emily embellished her print with glitter glue and hot fix crystals.


Tulle was used to embellish crayon prints


Cindy & Kathy melting crayons in the skillet


Martha's Show 'n Tell
We all loved her pink bag created from clothesline and fabric strips!

She also brought in a couching project from our January class
3 Burner Stove


CLICK HERE to view our Jello Printing Class

CLICK HERE to view our Shaving Cream Stenciling Class

CLICK HERE to view our Tote Bag Stenciling Class

CLICK HERE to view Journal Quilts created in our classes

Permission 2 Play meets the 4th Thursday of every month at 1pm at JanniLou Creations Quilt Shop in Philomath, Oregon

Questions? Contact LuAnn Kessi at kessi@pioneer.net

Friday, February 26, 2010

Quilted Sunshine...


Click Images toEnlarge:


Quilted Sunshine
Tablerunner


Quilted Sunshine Tablerunner

Look what you can make with those 5 inch charm square packs you have in your stash!


Quilted Sunshine Detail

I was just notified this morning that my tablerunner is part of a slideshow and contest on THE QUILT SHOW.

CLICK HERE to view the SLIDESHOW

CLICK HERE:  to see My Quilts

May Your Bobbin Always Be Full,
LuAnn

Tuesday, February 23, 2010

My Secret Garden...


Click Image to Enlarge:


My Secret Garden
20 x 30 Quiltlet

Jello/Gelatin Monoprinting
Pieced and Applique' Borders
Free Motion Machine Quilting
Hanging Triangles, Fast Finish Binding and Fast Fused Label on Back.

CLICK HERE:  to see My Quilts

CLICK HERE to see a Jello Printing Slideshow


May Your Bobbin Always Be Full,
LuAnn


Sunday, February 21, 2010

Jello Botanical Print....Quilting


Click Images to Enlarge:


Jello Botanical Quiltlet 20 x 30 inches

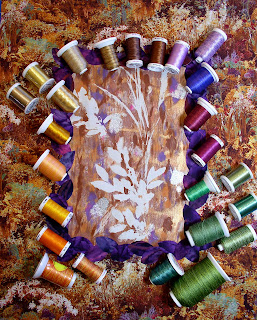
Auditioning Quilting Threads
I was surprised I pulled so many threads for such a little quilt.


Auditioning Green Threads for the Purple Leaf Applique'
Look.....I chose all variegated threads.
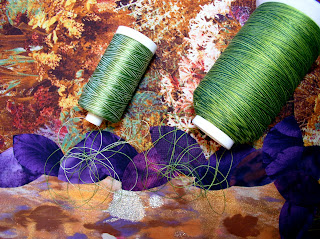


My 2 Favorites of the Green Threads

I need to stitch them out on a sample to see which looks best...


This is a YLI 40 wt Cotton Thread.
I like this thicker thread.
I used a 90/14 Topstitch Needle for this heavy Thread


This is an Aurifil Thread......lots of sheen.
I used a 80/12 Topstitch Needle for this thread.


Both green threads stitched out on purple sample leaves.
I put the leaves on the quilt to see how they look...


I chose the Aurifil thread.
I like the white in the thread, it goes with the white in the central jello print and also in the border fabric.


Fusible Interface on back side of quilt top
...to Stabilize Quilt during heavy thread work


White & Green Aurifil Thread to Applique' Leaves

The white in the thread brightens up the dark purple leaves.
Just what I was hoping it would do...


King Tut Purple Variegated Cotton Thread

I chose this thread to stitch on the white negative jello print.
It should enhance the botanical print and also warm it up a bit so it is not so stark white in appearance.


King Tut stitched onto jello print
I used a 80/12 Topstitch Needle for this thread.
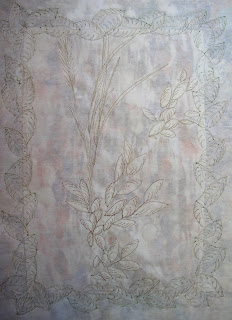


Back Side of Quilt Top...
Thread Work Done

I am ready to baste the top to batting and backing fabric...


Green Backing Fabric
Green Bottom Line 60 wt bobbin thread....very thin.


Gold Metallic Thread
Overstitched the jello print with metallic to give it some glitz!
I used a 90/14 Topstitch Needle for the metallic thread.
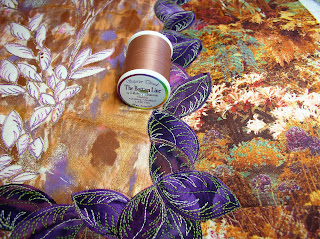


Brown Bottom Line 60 wt Thread
Stitched around the leaves to give them definition.

This lightweight thread blended in perfectly around the edges of the leaves and did not distract from the green variegated stitching.
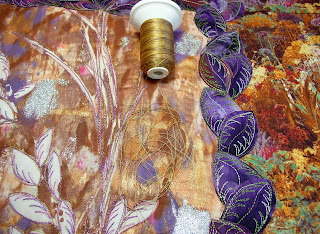


YLI Variations Teddy Brown Thread

I chose this for the background quilting.
I want it to blend in with the background and not take away from the jello print.


Background Quilting Done

I chose simple lines of quilting.
The thread worked perfectly. It adds texture, but does not distract from the main botanical print.


My Secret Garden
Quilt

20 x 30 inch Jello Print

Ready for Binding!

CLICK HERE:  to see My Quilts

CLICK HERE to view Jello Printing Slideshow

CLICK HERE to view a Jello Printing Video

Art Quilts CLICK HERE

Thread Shed CLICK HERE


May Your Bobbin Always Be Full,
LuAnn