Tuesday, December 29, 2009

Cow Pony Rust Quilt....Machine Quilting


A good thread stash is JUST as important as a good fabric stash!
Repeat that out loud 3 more times...


Click Images to Enlarge:

Thread Stitch Outs 1 of 2

I put together 2 sample sandwiches from leftover rust fabric, batting and backing fabric. When auditioning threads, I know exactly what they will look like on the actual quilt.....no guessing games.

The two brown variegated threads on the left did not appeal to me at all. Even tho very subtle color change, it was enough to be distracting.
I like the orange Mettler polysheen in the center.
I like the 24K Gold thread too.
The far right is gold metallic and it did not stitch well into the rust fabric.


Thread Stitch Outs 2 of 2

The first stitch outs were so flat looking, so I decided to double up on the batting in this sample sandwich.......much better. The stitching is so much more defined and puffy.

The brown Mettler in the center was too dark. I was afraid it would distract from the rusting motifs.
Again, I was pleased with the 25K Gold and the Orange threads.


The 24K Gold Rayon was so yummy quilted into the double layer of batting.
It won the audition!

Finally.....I can begin putting the frosting on the cake...


At this point, I am still uncertain about a final border treatment.
I am leaving an extra 5 or 6 inches of batting and backing fabric just in case I want to add one more border to this quilt top later on.


Big, well defined 24K Gold Feathers

The feathers are big and beautiful, but do not fight for attention with the rusting motifs. They are working harmoniously with the rest of the quilt design.
Just what I was hoping for...
I guess all those hours of auditioning and stitching out thread samples worked.


Cross Hatching all chalked out in the background.
I love Miracle Chalk. It stays on until you iron it off.


5pm......time to quit......not that I want to.
I have dinner company coming shortly and I need to get in the kitchen and rattle those pots and pans!

The grid work will have to wait for tomorrow...


May Your Bobbin Always Be Full,
LuAnn
To see my New Work CLICK HERE

To see the Thread Shed CLICK HERE

To see my Exhibit Quilts CLICK HERE

Sunday, December 27, 2009

Cow Pony Rust Quilt....Threadwork


Time to play with threads...

Click Images to Enlarge:

Cow Pony Rust Quilt
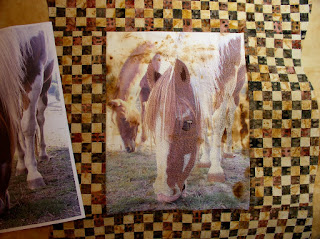
Threadwork done on photograph in center of quilt
Satin Stitched Woven inner Border

I am in need of a new camera....these photos leave a lot to be desired.
Thankfully the threadwork is much darker and nicer than these photos portray.


Threadplay on Phototransfer
I can't say enough about the Superior Bottom Line threads!
They are so perfect for heavy threadwork.
Lightweight, no thread build up on front or back side of quilt top.

I used a tiny size 60 needle for all of the threadwork.
The bottom line thread fit through it nicely, and the tiny needle created a tiny hole.


Satin Stitching
Auditioning Threads

I liked the look of the variegated threads.
I kept track of stitch width and length used in the stitch outs.
This was a great reference when I made my thread choice later on in the day.

I decided on the solid brown Mettler Polysheen thread for the satin stitching around the woven inner border. It has a nice sheen to it, and the solid thread defined the edge nicely.

I used a size 80 topstitch needle for the satin stitching, the polysheen thread was a perfect fit in the size 80 needle.
I always try to use the smallest needle possible when I can.


Stabilizer

I used an iron-on cut-away stabilizer on the backside of the quilt top.
This helped stabilize the quilt during the heavy threadwork on the phototransfer.

The stabilizer was the biggest help when it came time to stitch the two layers of satin stitching around the woven inner border. The quilt top did not buckle at all during the satin stitching....it lays nice and flat thanks to the stabilizer.


6pm.....quit stitching for the day.

Tomorrow I will layer the top with batting and backing and begin the machine quilting.
For me........this is "the frosting on the cake!"


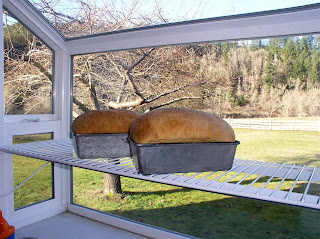
Bread cooling in the kitchen window...


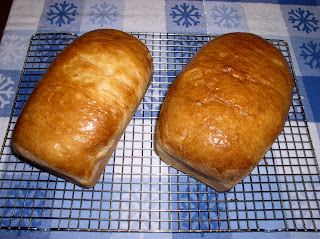
Buttered Bread is so pretty


Rice Pudding

Our boys came home for the holiday so I made two of their favorites.
Sometimes I have to tear myself away from the stitching and earn my keep around this place...

You can see more rust dyeing HERE

You can see more free motion quilting HERE


May Your Bobbin Always Be Full,
LuAnn

To see my New Work CLICK HERE

To see the Thread Shed CLICK HERE

To see my Exhibit Quilts CLICK HERE

Tuesday, December 22, 2009

Cow Pony Rust Quilt....Auditioning Threads


When Mother Nature Speaks......I need to listen more closely

Click Images to Enlarge:

Intentionally Blank

I last left you when I was in a state of indecision
I was trying to decide whether to put the horse shoes on the top or the bottom.
I was trying to listen to what the quilt was asking for...
I should have been listening to "Mother Nature"
"Ye Shall Not make Design Choices when having HOTflashes"

My brain was BLANK...

I have known this about myself for years now.
I cannot make color choices or design decisions when my hormones are flaring.
Instead of listening to my body, I was behaving like a quilter, I was listening to the quilt.

I left the Thread Shed for a couple of days until it was safe to....go back in.


I just love the rusting on the horse shoes


You can really appreciate rust dyeing in all its splendor in these close ups of the horse shoes worn by Dancer the Cow Pony.

Dancer started out as my trail horse in 1991. He was like riding a rocking horse and he had the best personality. He eventually became my husband's #1 roping horse, and what a time they had together. I have videos of the two of them in the arena roping horns and feet. Dancer earned the name Cow Pony because he loved cattle so much. When he wasn't in the roping arena, you could find him out in the pasture surround by a herd of yearling cattle. This is known as being "cowy."


After the hotflashes subsided 2 days later...
I walked into the Thread Shed....took one look at the design wall...
and immediately knew where to put the horse shoes.
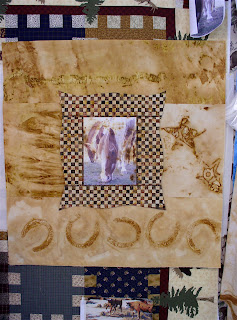
They didn't belong on the top....or the bottom.....they belonged on the side!

What a relief....my indecision had passed.


I thought I would take advantage of my moment of clear thinking and make some thread choices.
I chose thin 60 wt. Bottom Line polyester thread for my threadwork on Dancer's face.
I absolutely love these threads for threadplay. They are fine and do not overwhelm the photographic quality of the image.

You can see threadwork on our dog SUZY HERE


Sample Quilting Sandwiches

Next I auditioned thread for the wide border area around the central image.
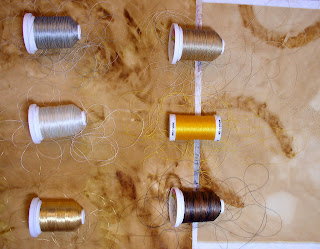
I went straight for YLI Variations Polyester threads. They have a very subtle color change and a beautiful sheen and they free motion quilt beautifully with a balanced stitch front and back side.
I also threw in a Robinson Anton Metallic and a Mettler Orange Polyester.


I am thinking I need a subtle, neutral color.
I don't want to overwhelm those gorgeous rusted motifs.
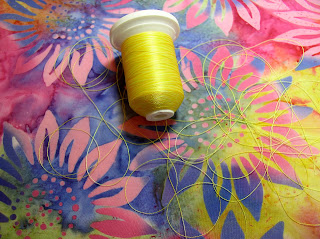
I spool out a generous amount of thread to puddle up on the fabric and give me a realistic idea of what the thread will look like stitched out.

I removed the darkest and the lightest threads.


These 4 threads are the finalists.
I will stitch them out on the sample sandwiches and see how they look.


Straight Stitch Thread Plate

I removed the zig zag stitch plate on the right and replaced it with the single hole straight stitch plate. I get a beautiful stitch on the back side of my quilt with the single hole.


Titanium Needles

Rust Dyed Fabric is tough to stitch through...
This is the strongest, sharpest needle in the cupboard.

I drew a few lines on the sample sandwiches... I am ready to stitch out a few of these threads to see which one will make it into the quilt.

Stay Tuned...

May Your Bobbin Always Be Full,
LuAnn

To see my New Work CLICK HERE

To see the Thread Shed CLICK HERE

To see my Exhibit Quilts CLICK HERE

Sunday, December 20, 2009

Cow Pony Rust Quilt.....continues


I am working on the rusted quilt entry again...

Click Images to Enlarge:

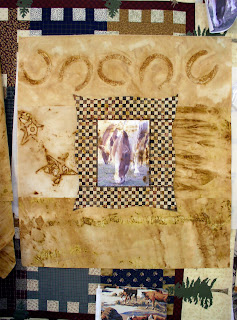
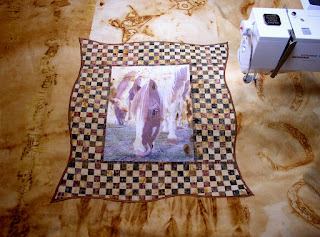
Cow Pony Quilt

The weaving is done and I am auditioning background rust fabrics
Background 1


Background 2


Background 3

None of these really gets me excited...


How about using ALL of the background rust fabrics!
I folded them up into borders and pinned them to the design wall.
Now this excites me...

The "Square-ness" of this looks rather boring.
Time to Un-Square it a bit...


I free-hand cut with the rotary cutter and gave the edges a smooth scallop curve.
This adds quite a bit of interest to the center photo transfer image and also the boxy, square appearance is gone...


Horse Shoes on top???


Horse Shoes on the bottom???

I agonized over this for a full day...
I finally took a break and got away from it for awhile.
When I walked back in the Thread Shed, I knew just what to do.

I will post more photos tomorrow...

You can see my previous work on this project by CLICKING HERE


May Your Bobbin Always Be Full,
LuAnn

To see my New Work CLICK HERE

To see the Thread Shed CLICK HERE

To see my Exhibit Quilts CLICK HERE

Friday, December 18, 2009

Quilted Sunflower Pincusion...


Another fun & fast project:

Click Images to Enlarge:

Quilted Sunflower Pincushions
5 x 6 inches


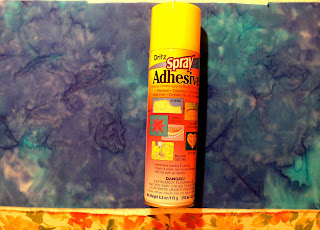
Layer a gorgeous fat quarter of fabric with batting and backing fabric into a quilt sandwich. I spray basted it together.


Choose a thread to quilt it.
Audition several colors until one appeals to you.


Drop the feed dogs, put on a darning foot and free motion til the cows come home!

You could also put on the walking foot and stitch straight lines in a grid pattern.


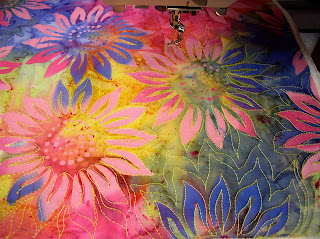
If you choose a fabric with a large motif, like the sunflowers, it gives you a design to quilt around.......and it's lots of fun!
This is a very manageable size and very good practice for machine quilting!


Cut up the fat quarter quilted sandwich into 9 sections, like a 9 patch block.
These measure approx. 5 x 6 inches each.


Choose a backing fabric for the back side of your pincushion.
Layer it with batting and spray baste the two layers together.


You are ready to sew your pincushion together.
Pretty sides together, top and bottom of pincushion.
I sewed a quarter inch all the way around.....leaving a space for turning it right sides out.


Here is my first pincushion sewn and ready to stuff.
I like these polyester pebbles, the size of rice.

Fill the bags nice and full, then whip stitch the opening closed.


Quilted Sunflower Pincushions


May Your Bobbin Always Be Full,
LuAnn
To see my New Work CLICK HERE

To see the Thread Shed CLICK HERE

To see my Exhibit Quilts CLICK HERE